0:00 / 8:04
Developed with YouTube

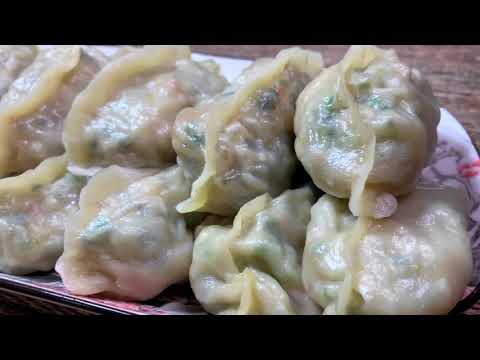
16 Classic and Practical Dumpling Wrapping Techniques

groups4 servingsspeedMediumcountertopsPrep: 10 minsscheduleTotal: 10 minsoutdoor_grillNo-cook
Allergens:warningGlutenwarningSoywarningSesame

Allergen labels are AI-generated and may be incomplete or wrong. If you have a food allergy, always verify every ingredient yourself.

Recipe details are AI-generated from the video and may contain errors — for reference only.

skilletInstruction

16 Steps Total
01
Preparation
00:00:05

Prepare an appropriate amount of dumpling wrappers and seasoned meat filling to start learning various dumpling wrapping techniques.

lightbulb

Watch out

Keep hands clean when wrapping dumplings to prevent wrappers from sticking due to moisture.

Ingredients:dumpling wrapper (1 piece)pork filling (15 g)

02
Active Cooking
00:00:16

Take a dumpling wrapper, add about 15g of meat filling, fold the edges together and seal completely into a semi-circle, or pinch neat ruffles along the edge using your index finger and thumb.

lightbulb

Watch out

Press the edges tightly when sealing, otherwise the filling may leak out during boiling.

Ingredients:dumpling wrapperpork filling
03
Active Cooking
00:00:40

Take a dumpling wrapper with about 15g of filling, fold and seal it, then bring the left and right ends together towards the center and seal them to form an ingot shape.

lightbulb

Watch out

Apply a little water or pinch tightly at the overlapping ends, otherwise they may open up during boiling.

Ingredients:dumpling wrapperpork filling
04
Active Cooking
00:00:54

Take a wrapper with about 15g filling, fold and seal the center, then push both sides inward and pinch tightly so the bottom is flat and can stand steadily.

lightbulb

Watch out

Do not trap too much air when tucking in the sides, otherwise they may burst open during boiling.

Ingredients:dumpling wrapperpork filling
05
Active Cooking
00:01:15

Take a wrapper with about 15g filling, seal it like the home-style method, then flip the middle part and pinch sharp corners at both ends, forming an S-shape or upturned corners.

lightbulb

Watch out

Be gentle when flipping the middle part to avoid tearing the wrapper.

Ingredients:dumpling wrapperpork filling
06
Active Cooking
00:01:35

Take a wrapper with about 15g filling, seal the center, then pinch one or two folds on each side to create symmetrical and neat pleats.

lightbulb

Watch out

The direction of the pleats on both sides must be consistent to maintain symmetry and appearance.

Ingredients:dumpling wrapperpork filling
07
Active Cooking
00:02:27

Take a wrapper with about 15g filling, fold it, then pinch a sharp peak in the middle and gather both sides to form an elegant shape with a small top corner.

lightbulb

Watch out

Pinch the top corner tightly to prevent juice leakage during pan-frying.

Ingredients:dumpling wrapperpork filling
08
Active Cooking
00:02:48

Take a wrapper with about 20g of generous filling, bring your thumbs together and squeeze in the middle to quickly wrap and seal the dumpling.

lightbulb

Watch out

Apply moderate force when squeezing to avoid breaking the wrapper and spilling the filling.

Ingredients:dumpling wrapperpork filling
09
Active Cooking
00:03:03

Take a wrapper with about 15g filling, use three fingers to fold up the edges, find the center, and pinch the three edges firmly together to form a triangle.

lightbulb

Watch out

The junctions of the three edges must be pinched tightly, otherwise they will easily crack during steaming or boiling.

Ingredients:dumpling wrapperpork filling
10
Active Cooking
00:03:27

Based on the triangle method, pinch one more edge, find and fix the center, and wrap into a symmetrical four-sided dumpling.

lightbulb

Watch out

Every corner of the quadrilateral must be aligned, otherwise the shape will be irregular.

Ingredients:dumpling wrapperpork filling
11
Active Cooking
00:03:43

Take a wrapper with about 15g filling, find the center like a triangle and pinch the middle, then pinch adjacent edges to form three circular pockets on top.

lightbulb

Watch out

The connections between the three pockets must be pinched firmly, otherwise they will come apart during cooking.

Ingredients:dumpling wrapperpork filling
12
Active Cooking
00:04:17

Take a wrapper with about 15g filling, pinch one end first, then alternately twist left and right to fold densely like a willow leaf.

lightbulb

Watch out

The amplitude of twisting the pleats left and right must be consistent for a neat and uniform appearance.

Ingredients:dumpling wrapperpork filling
13
Active Cooking
00:04:39

Take a thinner wrapper with about 15g filling, start pleating like a bun, stop when almost done, gather remaining wrapper together and seal to form a shrimp-dumpling shape.

lightbulb

Watch out

The wrapper at the seal is thicker, press it slightly thinner when pinching to avoid being undercooked.

Ingredients:dumpling wrapperpork filling
14
Active Cooking
00:05:02

Take a wrapper with about 15g filling, seal, but only pleat on one side to create parallel diagonal folds, great for pan-fried dumplings.

lightbulb

Watch out

Apply even force when pleating on one side to ensure consistent width for each fold.

Ingredients:dumpling wrapperpork filling
15
Active Cooking
00:05:38

Roll wrapper into oval, add about 15g filling and fold, pinch corners in, then use thumb nail to push up and lock the edge, repeat to create locked pattern.

lightbulb

Watch out

Apply moderate force when pushing to lock the edge, avoiding piercing the wrapper with your fingernail.

Ingredients:dumpling wrapperpork filling
16
Active Cooking
00:06:33

Use two slightly smaller dumpling wrappers with about 20g filling in the middle, seal edges aligned, then twist delicate rope-like ruffles along the edge to form a round sun dumpling.

lightbulb

Watch out

Do not trap too much air between the two wrappers, and pinch tightly when twisting the ruffles to prevent leakage.

Ingredients:dumpling wrapper (2 piece)pork filling (20 g)

groceryAll Ingredients

dumpling wrapper16 piece
pork filling250 g

blenderAll Tools Needed